Simple Nail Tips: Your Ultimate Guide To Salon-Perfect Manicures At Home
Have you ever stared at your nails, wishing for that flawless, salon-fresh look without the time, expense, or commitment of a professional appointment? You’re not alone. Millions of people desire beautiful, well-groomed nails but feel intimidated by the process or believe it requires special skills and a arsenal of products. The truth is, achieving stunning results is entirely possible with a handful of simple nail tips and a bit of know-how. This guide demystifies at-home nail care, breaking down the essentials into easy-to-follow steps. Whether you’re a complete beginner or looking to refine your routine, these foundational techniques will transform your nail game, saving you money and delivering consistent, gorgeous results you can be proud of.
The Foundation: Master Your Nail Preparation
The single most critical simple nail tip that separates chip-prone, lackluster manicures from long-lasting, salon-quality ones is proper nail preparation. Think of it as building a house—you wouldn’t paint on a dirty, uneven foundation. The same principle applies to your nails. Skipping or rushing this step is the primary reason DIY manicures fail prematurely.
Begin with clean, dry nails. Use a gentle nail polish remover to eliminate any old polish or residue, even if your nails appear bare. Oils from your skin and everyday grime create a barrier that prevents polish from adhering properly. Next, file your nails into your desired shape. The key is to file in one direction only, using a gentle sawing motion. Back-and-forth filing creates microscopic tears and weakens the nail plate, leading to splits and peels. A glass or crystal file is ideal as it’s less abrasive than emery boards. After shaping, gently buff the surface of each nail with a fine-grit buffer block. This isn’t about thinning the nail; it’s about lightly smoothing the surface and removing the shiny top layer, which allows the base coat to grip better. Finally, and this is non-negotiable, push back your cuticles. Soak your fingertips in warm, soapy water for 3-5 minutes to soften the cuticles. Then, using a cuticle pusher (orange stick or metal tool, used gently), carefully push the cuticle skin back from the nail plate. Do not cut or trim your cuticles—they are a vital protective barrier. This step exposes the tiny ridge at the base of the nail, ensuring polish adheres all the way to the cuticle line for a cleaner, longer-lasting finish. Wipe each nail again with remover on a cotton pad to remove any residual dust or oils from filing and buffing. Your nails are now a perfect, prepped canvas.
Cuticle Care: The Secret to Healthy, Strong Nails
Healthy cuticles are the unsung heroes of great-looking nails. They form a tight seal that protects the nail matrix—the growth center—from bacteria, fungi, and damage. Neglected, dry, or overgrown cuticles can lead to hangnails, infections, and an unkempt appearance, no matter how perfect your polish application is. Therefore, consistent cuticle care is a non-negotiable simple nail tip.
Incorporate cuticle hydration into your daily routine, not just during manicures. After washing your hands or showering, apply a nourishing cuticle oil or a thick hand cream and massage it into your nail beds and cuticles. Look for oils with ingredients like jojoba, vitamin E, or almond oil, which are easily absorbed and deeply moisturizing. For a weekly intensive treatment, apply a generous amount of cuticle cream or oil, then put on cotton gloves and leave it on overnight. This creates a warm, occlusive environment that allows the product to penetrate deeply. When pushing back cuticles during your prep, always be gentle. Aggressive pushing can cause trauma and inflammation. If you have persistent hangnails, never pull or bite them. Instead, carefully trim the loose skin with clean, sharp cuticle nippers, leaving a tiny bit of skin to avoid a painful open wound. Remember, the goal is to maintain a neat, tidy cuticle line, not to remove the cuticle entirely. Well-hydrated, pushed-back cuticles create a smooth gradient from skin to nail, making any polish color look more professional and elegant.
The Non-Negotiable Trio: Base Coat, Color, and Top Coat
Understanding the roles of your three core products is a fundamental simple nail tip that elevates your manicure from amateur to expert. Each layer has a specific, vital function, and skipping any compromises the final result.
The base coat is your manicure’s foundation. Its primary job is to create a sticky, adhesive surface for your colored polish to grip onto. It seals the nail plate, prevents staining from dark pigments (like reds, blues, and blacks), and can add strength with ingredients like keratin or calcium. Always apply one thin, even layer and let it dry completely—about 60-90 seconds—before touching color. The color polish is where creativity happens. For a flawless application, use the “three-stroke method”: one stroke down the center of the nail from cuticle to tip, and then one stroke on each side. Avoid applying a thick layer; two thin coats are always better than one thick, gloppy one that will take forever to dry and is prone to denting and bubbling. Finally, the top coat is the protective shield. It seals in your color, adds high-shine or matte finish, and provides a hard, scratch-resistant layer that guards against everyday wear and tear. A good top coat is the difference between a manicure that lasts three days and one that lasts a week or more. Apply one smooth, even layer, making sure to “cap” the free edge—run the brush lightly over the very tip of your nail. This seals the polish at the stress point, preventing the most common cause of chipping. For ultimate durability, consider a quick-dry top coat as your final layer.
Embrace Simple Nail Art: Less is More
You don’t need intricate designs or professional tools to have stylish nails. One of the most empowering simple nail tips is mastering a few easy, elegant nail art techniques that look sophisticated with minimal effort. The current trend leans heavily towards minimalist and negative space designs, which are perfect for beginners.
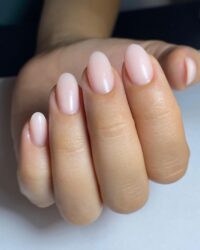
- The Classic French Manicure (Modernized): Forget the stark white tip. Try a “soft French” by using a sheer pink or beige for the tip instead of white, or a “half-moon” design where you paint just the cuticle area in a contrasting color using a thin brush or a band-aid as a stencil.
- Accent Nail: Paint all your nails a neutral color—nude, taupe, light gray, or sheer pink—and choose one nail per hand (often a ring finger) to feature a different color, a glitter polish, or a simple geometric shape like a thin line or dot.
- Dotting Tool Magic: A single dotting tool (or even the end of a bobby pin or toothpick) opens up a world of simple designs. Create polka dots, a simple daisy (a circle of dots around a central dot), or a minimalist line of dots along the cuticle or tip.
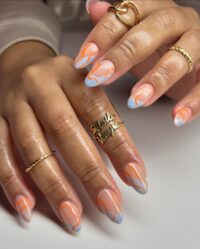
- Striping Tape: This inexpensive tool is a game-changer. Apply a base color, then place thin striping tape on the nail in a pattern—diagonal, vertical, or as a V-shape at the tip. Paint over it with a second color, let it dry slightly, and carefully peel the tape away to reveal a crisp, clean line.
- Glitter Gradient (Fade): Apply a base color. While it’s still slightly tacky, use a makeup sponge dabbed in glitter polish to press and blend the glitter from the tip downwards, creating a soft, faded ombré effect. It’s messy-looking but incredibly chic and easy.
The key to simple nail art is precision and a steady hand, which comes with practice. Use tape to create clean lines and don’t be afraid to use a small brush dipped in remover to clean up any mistakes around the cuticles immediately. A clean, sharp line makes even the simplest design look intentional and professional.
Invest in the Right Tools: Quality Over Quantity
You don’t need a drawer full of gadgets, but a few key, quality tools make every step of your manicure easier, faster, and more effective. This is a simple nail tip that pays for itself in saved time and better results.
First, a good set of nail files and buffers. As mentioned, a glass or crystal file is superior for shaping. Have a coarse side for shaping and a fine side for smoothing. A multi-sided buffer block (with grit levels labeled) is essential for the prep stage. Second, invest in a metal cuticle pusher with a flat, angled edge. Wooden sticks can splinter and are less precise. A metal tool, when used gently, provides better control. Third, a set of basic nail art brushes. You don’t need 50. A few sizes—a thin liner brush (000 or 001) for fine lines and dots, and a slightly wider flat brush for cleaning up—are invaluable. Fourth, a set of striping tapes in various widths and colors. And finally, a set of dotting tools of different sizes. These simple, inexpensive tools allow you to create a vast array of designs with control that a brush alone cannot provide. Keep your tools clean. Wipe brushes with brush cleaner or remover after each use, and sanitize metal tools with rubbing alcohol. Well-maintained tools perform better and last longer, making them a worthy investment in your nail care kit.
Respect the Dry Time: Patience is a Virtue
Rushing the drying process is the silent killer of beautiful manicures. Impatience leads to smudges, dents, and bubbles that ruin the smooth surface you worked hard to create. This simple nail tip is all about managing your time and environment.
Polishes, especially thick coats or gel-like formulas, need adequate air exposure to harden fully. The surface may feel dry to the touch in 10-15 minutes, but the underlying layers can remain soft and vulnerable for hours. A general rule: wait at least 2-3 minutes between each coat (base, two colors, top coat). After your final top coat, avoid any hand activity for a full 15-20 minutes. Do not test if it’s dry by touching your thumbnail to your index finger—this creates a pressure point that can cause a dent. Instead, lightly tap two nails together; if they don’t stick, it’s likely safe. To speed up drying without compromising quality, use a quick-dry top coat as your final layer. These formulas contain solvents that evaporate rapidly. You can also use a nail dryer fan, which blows cool air over your nails to accelerate solvent evaporation. Ensure your environment is cool and not humid; heat and humidity dramatically increase dry time. If you must use your hands, be extremely gentle for the first hour. This patience ensures your manicure cures to a hard, glass-like finish that resists chips and scratches.
The Maintenance Mindset: Extend Your Manicure’s Life
A great manicure doesn’t end when the polish dries. Simple, daily habits can significantly extend its lifespan, keeping your nails looking fresh for a full week or more. This is a crucial simple nail tip for long-term beauty.
First, wear gloves for any household chore involving water or chemicals. Dishes, cleaning, gardening—water and harsh soaps are polish’s worst enemies. They cause swelling and shrinking of the nail plate, which lifts polish. Second, apply a thin layer of top coat every 2-3 days. This “top-up” seals the surface, replenishes shine, and fills in any microscopic wear on the free edge, preventing chips from spreading. Third, keep your hands moisturized, but avoid the nail plate itself with heavy creams right after polishing, as oils can soften the polish. Apply lotion to the skin around your nails. Fourth, be mindful of how you use your fingertips. Use the pads of your fingers, not the tips of your nails, to open containers, type, or scratch. This reduces direct impact on the polish. Finally, if you do get a small chip, don’t ignore it. A tiny chip at the tip will quickly grow into a large peel. As soon as you see it, apply a tiny drop of top coat directly onto the chipped area and let it dry. This seals the loose edge and buys you more time.
Common Mistakes to Avoid: Troubleshooting Your Technique
Even with the best tips, common pitfalls can trip you up. Knowing these simple nail tips for error avoidance is half the battle.
- Applying Thick Coats: This is the #1 cause of bubbling, slow drying, and premature chipping. Thin coats are your friend. It may feel like you’re using less polish, but the coverage is better and the result is stronger.
- Skipping the Base Coat: This leads to staining (especially from reds and dark colors) and poor adhesion. Never skip it.
- Not Cleaning the Brush: Wiping your brush on the bottle neck leaves dried polish on the bristles, which then transfers to your nail as lumps. Wipe the brush on the inside neck of the bottle where there’s no polish, or use a brush cleaner.
- Using Old Polish: Polish thickens and becomes gloppy over time (usually after 12-18 months). It won’t apply smoothly. Use a few drops of polish thinner to revive it, but if it’s gritty or separated, it’s time to toss it.
- Shaking the Bottle: This creates air bubbles in the polish. Instead, roll the bottle firmly between your hands for 10-15 seconds to mix the pigments without introducing air.
- Painting the Cuticles: Getting polish on your skin looks messy and is harder to clean up without ruining the design. Use a small brush dipped in remover for instant cleanup, or apply a thin layer of petroleum jelly (Vaseline) around your nails before you start. Any polish that lands on the skin will wipe away cleanly.
Conclusion: Beautiful Nails Are Within Your Reach
Achieving salon-perfect nails at home isn’t about having dozens of products or innate artistic talent. It’s about mastering a sequence of simple nail tips that prioritize health, preparation, and technique. By committing to thorough nail preparation, consistent cuticle care, and understanding the sacred trio of base, color, and top coat, you build a flawless foundation. From there, embracing minimalist nail art with the right tools allows for endless creativity without complexity. Respecting dry time and adopting a maintenance mindset ensures your hard work lasts. And by avoiding common mistakes like thick coats and skipping base coats, you eliminate the primary reasons DIY manicures fail. Incorporate these principles into your routine, practice patience, and you will discover that beautiful, strong, and long-lasting nails are not a luxury reserved for salon visits. They are a simple, satisfying skill you can master in the comfort of your own home, one manicure at a time. Start tonight—your perfect nails await.